Last year, I wrote a blog post about CPU Profiling and the tools on Linux. Today I’m going to write about a few Performance profiling tools on Windows platform. Last week I was working on profiling and analyzing the build process of a project on Windows, and during the process I experimented with a few different tools.
Performance Monitor (perfmon)
Performance Monitor is a small utility provided by Windows OS, you can start it by running command perfmon. With perfmon, you can monitor real-time system performance, and record performance to files for post analysis. This tool provides some extremely useful interfaces in its GUI.
Real-time Performance
To view current performance activity, you just need click on the Performance Monitor button in the left panel:
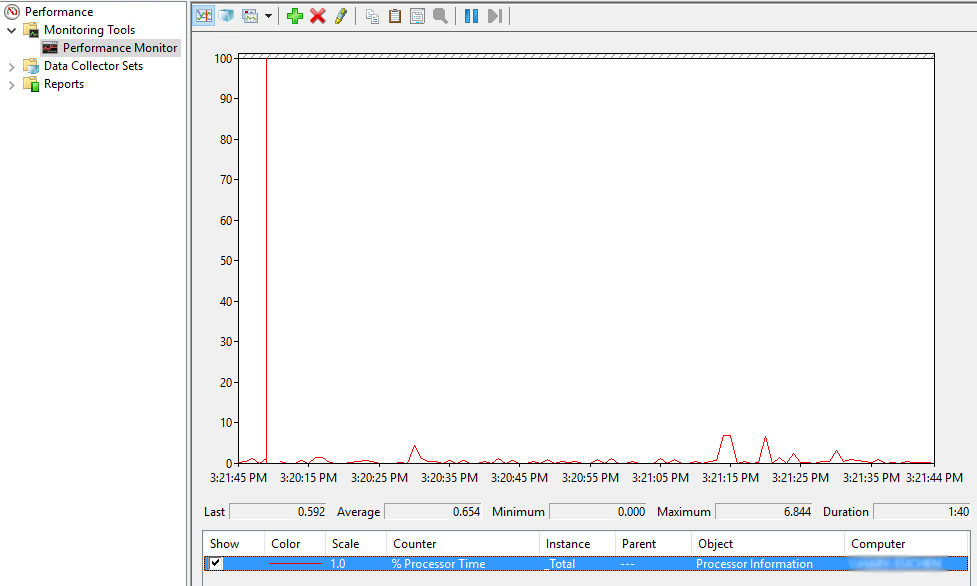
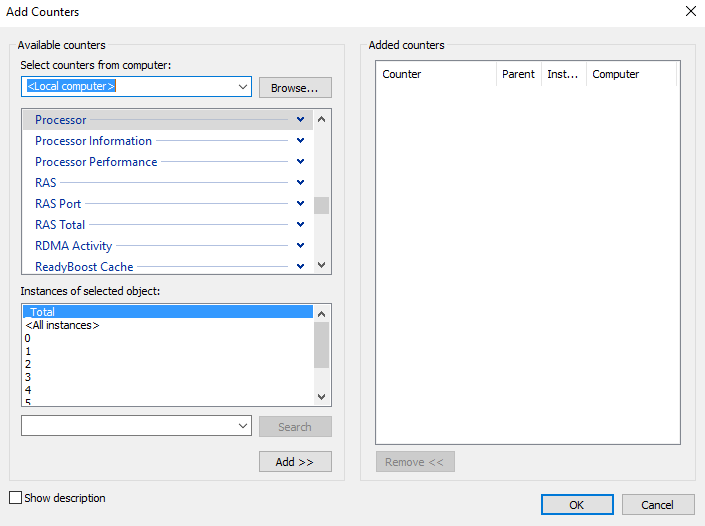
By default, this view has only one performance counter: % CPU Processor Time. You can add more counters you need, such as Processor’s Idle Time, Cache Performance, Network Performance and a lot more.
Performance Recording
When analyzing an application’s performance, we often need record all the performance data and generate various reports to help analysis. We can do this in perfmon by adding User Defined Data Collector Sets (from Menu Action -> New -> Data Collector Sets).
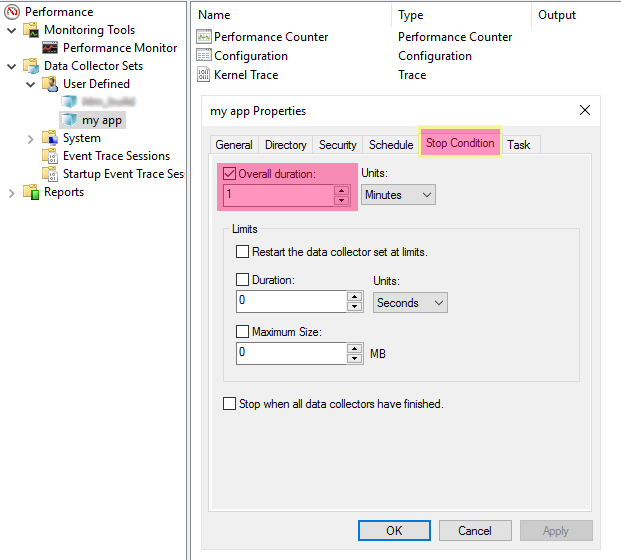
Perfmon allows you to choose a template to start with, and specify the location where the performance data will be saved. The process is quite straightforward as provided in the GUI. There is only one thing that you need pay attention to: the Stop Condition. By default, a newly created Data Collector Sets has “stop condition” as “Overall duration: 1 minute”. With this condition set, the performance recording will stop in 1 minute after starting. If the process you are monitoring takes longer than 1 minute to finish, you definitely want to increase this “Overall duration” to some longer time.
With the added Data Collector Sets, you can start recording before running your application, and stop recording any time you want. The recorded data will be shown in the Reports session in the left panel. The report can also be viewed as graphs in the Performance Monitor.
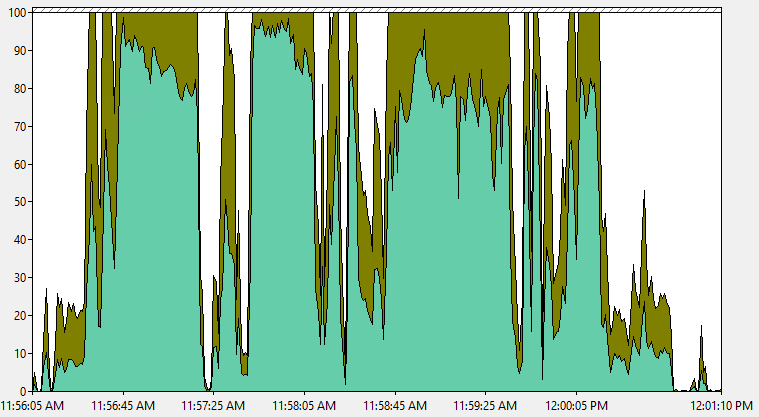
The following is one example of displaying performance report in Stacked Area Graph. The other graph types you can choose are: Line, Histogram bar, Area.
Windows Performance Recorder (WPR)
Windows Performance Recorder (WPR) is a performance recording tool that is based on Event Tracing for Windows. It is available for Windows 8 or later. It records system events that you can then analyze by using Windows Performance Analyzer (WPA). This tool is included in the Windows Assessment and Deployment Kit (Windows ADK), and you can download it here.
Recording with WPR
When WPR starts, it will guide you to choose a few configurations: profiles, scenario, details level and logging mode. You can follow the instructions here on Microsoft Docs to decide how to choose for your needs.
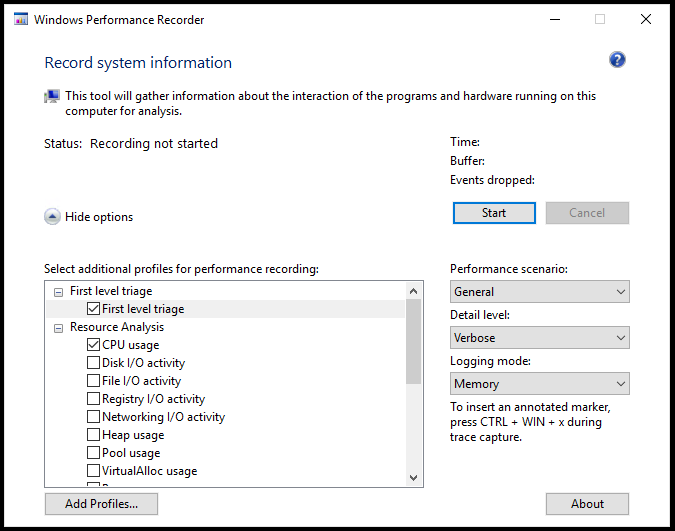
Then you can start recording performance by clicking the “Start” button. The recording will end when you click the “Save” button or “Cancel” button. If “Save” is clicked, the performance data will be stored to files, and Windows Performance Analyzer (WPA) will be automatically launched to show the performance reports.
Reporting in WPA
WPA provides detailed performance analysis data in its rich user interface. In the left “Graph Explorer”, you can choose to view performance graphs for System Activities, Computation, Storage, Memory, and Power. To see the graphs, just drag the graph to the “Analysis” tab on the right side.
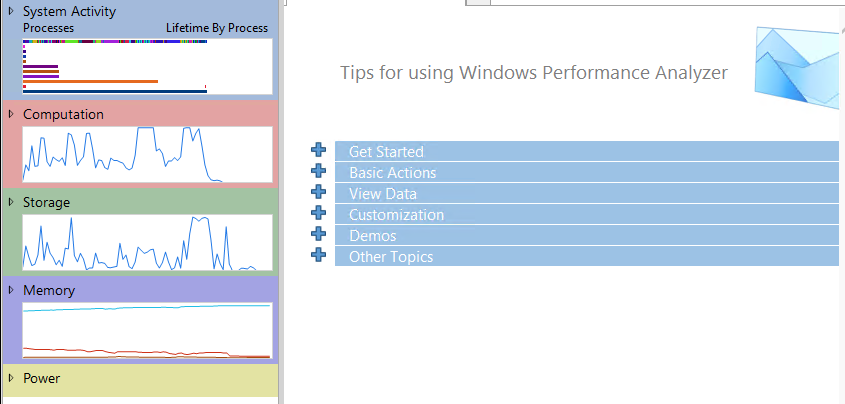
Comparing to Performance Monitor (perfmon), WPA reports give you more details and flexibility to explore the data.
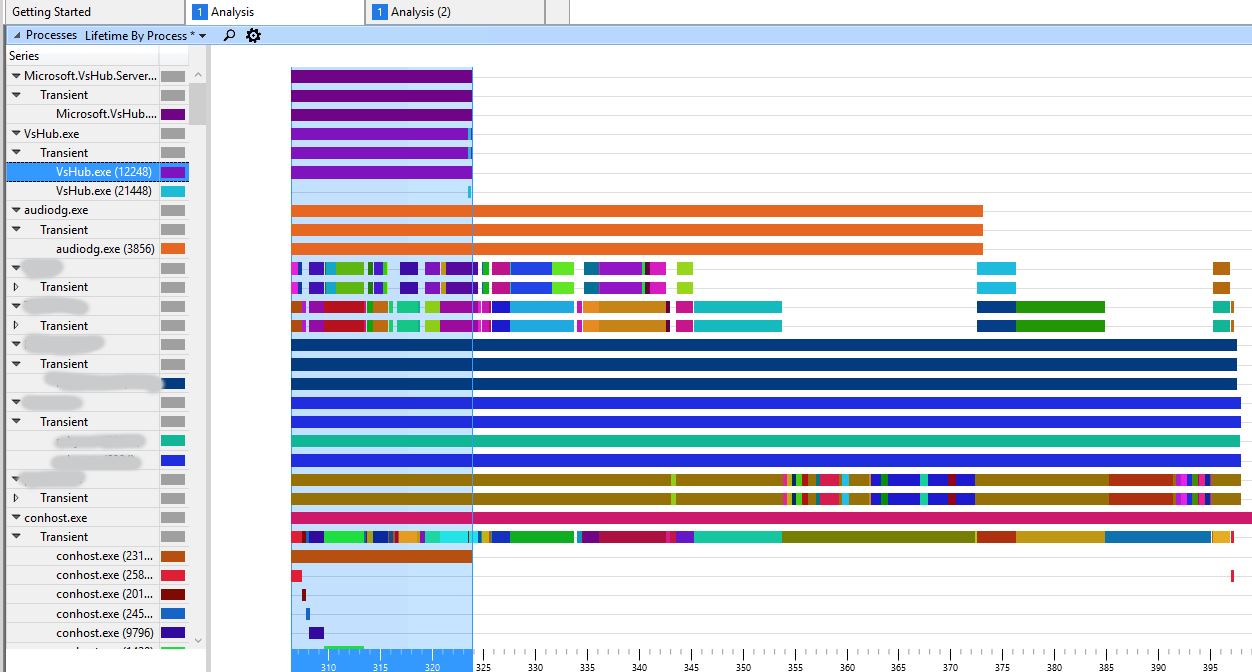
This graph is a process lifetime graph generated by WPA.
Load symbols in WPA
WPA supports loading symbols so you can see more details of each process or command. The paths of symbols can be added either from UI, or by setting environment variable _NT_SYMBOL_PATH. Read this instruction if you need understand how to load symbols or configure symbol paths in WPA.
Xperf
Xperf is a command-line tool for performance recording on Windows. It is also included in the Windows Assessment and Deployment Kit (Windows ADK). Starting from Windows 8, WPR becomes the recommended tool for performance recording, the support is still maintained for Xperf though.
Xperf works in a similarly way as WPR. It doesn’t have a GUI, but provides about ten command line options to process performance recording. The most commonly used ones probably are just start and stop.
You can simply start Xperf performance recording using this command:
1
| |
When recording is done, the generated *.etl file can be opened and viewed in WPA.
Process Explorer
Lastly, I’d like to introduce a light-weight tool Process Explorer, aka. procexp. Process Explorer is included in Windows’ Sysinternals Process Utilities.
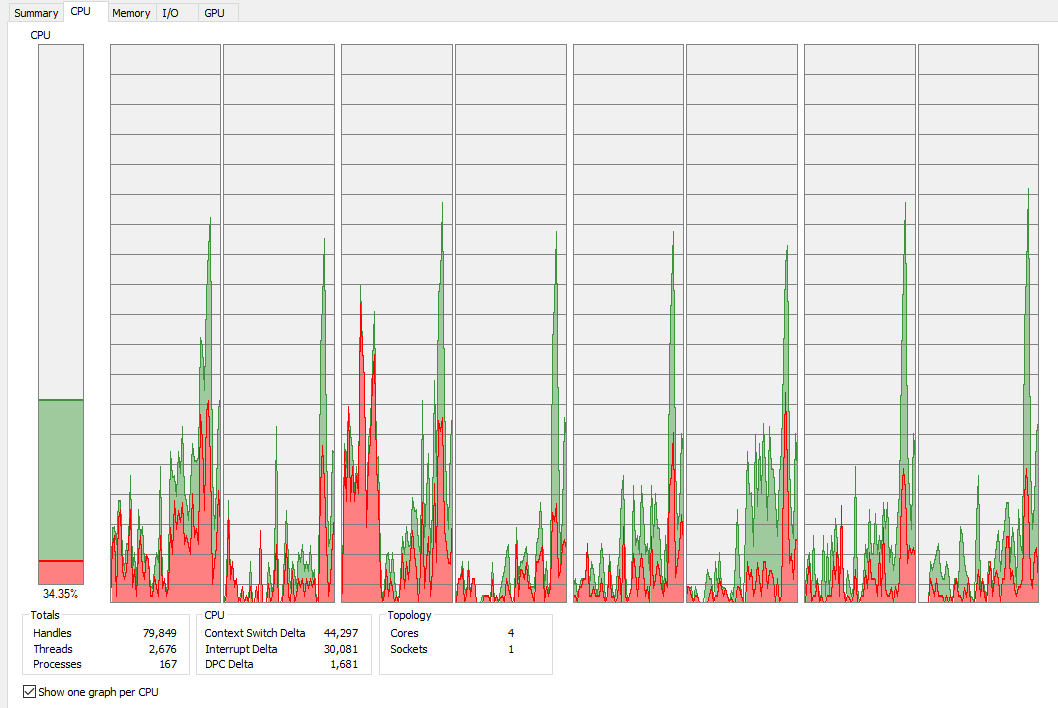
Process Explorer provides a CPU performance monitor. Comparing to the CPU monitor in Task Manager, this one has enhanced features for you to monitor CPU utilization of each core and each thread. You can view a graph for each CPU.